This was my final choice on the direction of my poster. Since the name of the town is Lake City, it's kind of mandatory to show a lake ;)

I began by tracing the actual lake, which was the easiest part. The color is 40% of Pantone 285 C.

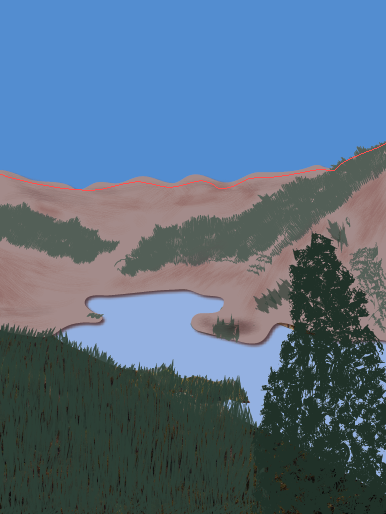
Then I traced the mountains. After I traced the mountains, they looked boring so I started adding trees and shading to add something to them. I also noticed there wasn't really a distinct separation between the bottom of the mountains and the water, so I added a drop shadow to the mountains. Now it looks like there's a little bit of depth between the two.

Then came the tricky part, the trees! It took me a while to find a brush that wasn't too blobby or jagged. I used a pretty simple brush for the pine trees, but I used a grunge brush for the large one in the foreground. I also wanted to distinguish the colors between the big tree and the background trees, so I multiplied the colors and made the foreground tree darker. The darker green is 100% Pantone 177-16 C and the lighter one is 75%. This screenshot also shows the added sky. I tried adding clouds, but nothing compared to the clouds in the original photo, they just looked fake and took away from what I was trying to convey in the picture. The color of the sky is 75% Pantone 285 C.
And finally, I added the text. Lake City is written in a font called "Respective" retrieved from fontspace.com. Colorado is written in Baskerville. I like how the letters in Lake City overlap Colorado. This poster was pretty tricky, but it was a lot of fun getting to stare at my favorite place for a while :) can't wait to go back next year!

No comments:
Post a Comment